 Pin It
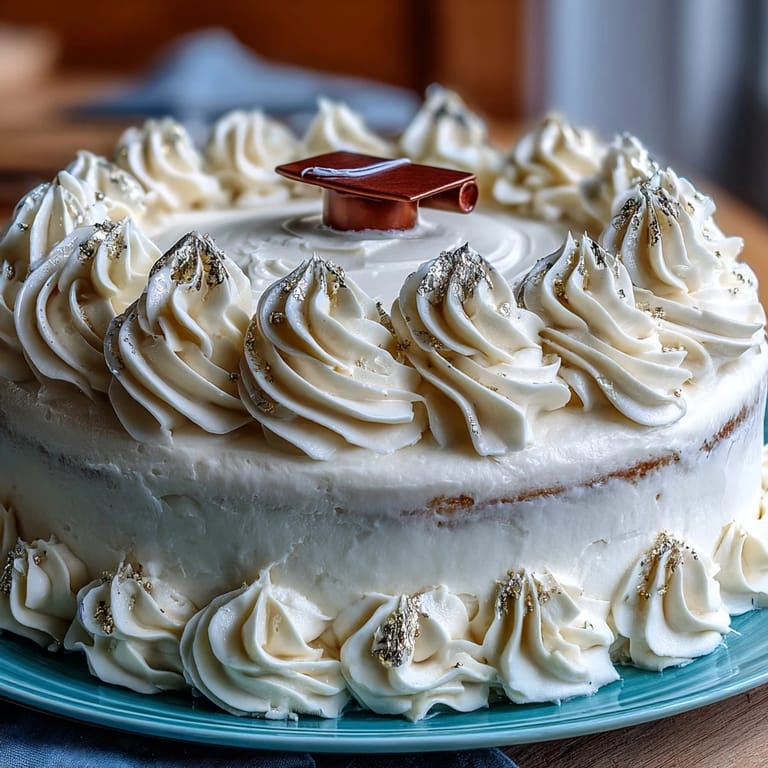
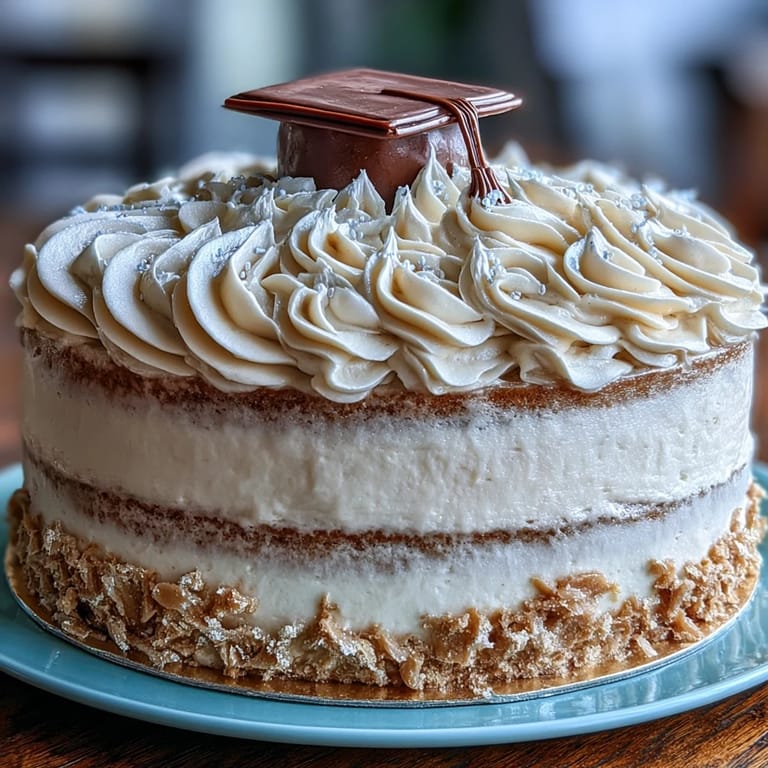
 My nephew called me three weeks before graduation asking if I could make something special for his party. His mom had mentioned my cakes casually at dinner one night, and he remembered. There's something about being trusted with a milestone moment that shifts the whole energy in your kitchen—suddenly every fold of batter matters, every stroke of frosting becomes intentional. This cake emerged from that conversation, designed to feel elegant but not intimidating, celebratory without being over the top. Gold foil and a tiny diploma topper transform a perfectly good vanilla cake into something that says, "We did it."
The morning of his party, I arrived early to help set up, and my nephew stood in the kitchen doorway watching me place that diploma topper on top of the frosting. He got this huge grin, and without saying much, he just nodded like it was exactly right. His friends devoured it throughout the afternoon, and I overheard someone ask if it tasted as fancy as it looked—turns out a really solid vanilla cake with good buttercream speaks louder than complicated recipes ever could.
Ingredients
- All-purpose flour: Two and a half cups gives you structure without being dense; measure by spooning into your measuring cup rather than scooping to avoid packing it down.
- Baking powder: Two and a half teaspoons is your leavening agent, so make sure it's fresh and not expired or your cake won't rise properly.
- Salt: Just a half teaspoon, but it brings out the vanilla flavor and balances the sweetness beautifully.
- Unsalted butter: One cup for the cake plus another one and a half cups for frosting, softened to room temperature so it creams smoothly without getting greasy.
- Granulated sugar: Two cups in the cake batter; beating it with butter until light and fluffy creates tiny air pockets that make the crumb tender.
- Large eggs: Four eggs at room temperature blend into the batter more evenly and create better structure than cold eggs.
- Vanilla extract: One tablespoon in the cake and two teaspoons in the frosting—this is where the flavor depth comes from, so use real vanilla if you can.
- Whole milk: One cup in the cake, three to four tablespoons in the frosting, all at room temperature so the batter stays smooth and emulsified.
- Powdered sugar: Five cups, sifted, prevents lumpy frosting and makes spreading infinitely easier.
- Edible gold foil: Delicate and magical; it needs dry hands or tweezers or it crumbles before you can apply it.
- Diploma topper: Store-bought or homemade from fondant, this becomes the focal point that makes people smile.
Tired of Takeout? 🥡
Get 10 meals you can make faster than delivery arrives. Seriously.
One email. No spam. Unsubscribe anytime.
Instructions
- Get your mise en place ready:
- Preheat your oven to 350°F and grease two 9-inch round pans, lining the bottoms with parchment paper so the cakes release cleanly. Having everything measured and at room temperature before you start means no scrambling mid-batter.
- Combine your dry ingredients:
- Whisk flour, baking powder, and salt together in a medium bowl until evenly distributed. This aerates the flour and distributes the leavening agent throughout, preventing pockets of underbaked cake.
- Cream the butter and sugar:
- Beat your softened butter and sugar together on medium-high speed for three to four minutes until the mixture is pale, fluffy, and noticeably lighter in color. You're basically beating in air, which gives the cake its tender crumb.
- Add your eggs one by one:
- Drop in one egg, beat until fully incorporated, then add the next—rushing this step can cause the batter to look separated and grainy. Once all four eggs are in, stir in the vanilla extract until combined.
- Alternate wet and dry additions:
- Add about a third of the flour mixture, beat gently until just combined, then add about half the milk, beat again, then continue with another third of flour, the rest of the milk, and finally the last flour. This method prevents overmixing, which would make the cake tough.
- Divide and smooth:
- Pour batter evenly between your prepared pans and smooth the tops with an offset spatula so they bake evenly. Uneven surfaces can lead to doming or uneven layers.
- Bake until golden:
- Bake for twenty-eight to thirty-two minutes, checking at the twenty-eight minute mark with a toothpick inserted in the center—it should come out clean or with just a few moist crumbs clinging to it. Overbaking dries out the cake, so err on the side of slightly underdone.
- Cool with patience:
- Let the cakes cool in their pans for ten minutes to set up, then turn them out onto wire racks to cool completely—at least one to two hours. Frosting a warm cake causes the frosting to melt and slide off.
- Make your frosting:
- Beat softened butter on high speed for about three minutes until it's pale and creamy, then gradually add your sifted powdered sugar while mixing on low speed. Add vanilla, salt, and milk one tablespoon at a time until you reach a spreadable consistency—too thick and it won't smooth, too thin and it'll slide right off.
- Level and layer:
- If your cooled cakes have domed tops, use a serrated knife to level them off so they sit flat and stack evenly. Place the first layer on your serving plate, spread a thick, generous layer of buttercream on top, then place the second layer over it.
- Apply a crumb coat:
- Spread a thin layer of frosting around the entire cake to seal in crumbs, then pop it in the fridge for thirty minutes. This extra step makes your final frosting look smooth and professional.
- Frost the final layer:
- Once the crumb coat is set, apply your remaining buttercream with an offset spatula in long, smooth strokes—work patiently and don't overthink it. A few swirls look more intentional than a perfectly smooth finish anyway.
- Apply gold foil with care:
- Using tweezers or completely dry fingers, gently apply small sheets of edible gold foil to select areas around the cake—the top, edges, or in clusters depending on your aesthetic. Work slowly and deliberately since the foil tears easily but looks stunning once placed.
- Crown with your topper:
- Position your diploma topper at the center or slightly off to one side, and add sprinkles or star confetti around it if desired. A few final decorative touches and you're done.
- Chill and serve:
- Give the cake a brief chill to set everything in place, then bring it to room temperature before serving for the best flavor and texture. A cake this pretty almost needs a moment of presentation before you cut into it.
 Pin It
 A few days after the party, my nephew texted me a photo of himself holding a slice, his graduation cap tilted on his head like he was making a joke about the diploma topper. That's the moment I realized this cake had become part of how he'd remember the day—not as a dessert, but as someone believing in him enough to spend an afternoon making something special. That's what matters in a celebration cake.
Flavor Customizations That Work
The vanilla base is intentionally neutral so it plays well with additions. I've added almond extract (just one teaspoon) for a subtle, sophisticated shift, and it made people pause mid-bite trying to identify what made it taste special. For someone who loves citrus, try adding the zest of one lemon to the batter and a teaspoon of lemon extract for brightness. Chocolate lovers can replace half a cup of flour with cocoa powder for a marble cake effect when you swirl the batters before baking. The buttercream takes food coloring beautifully too—gel colors work best since they won't thin out the frosting like liquid colors do.
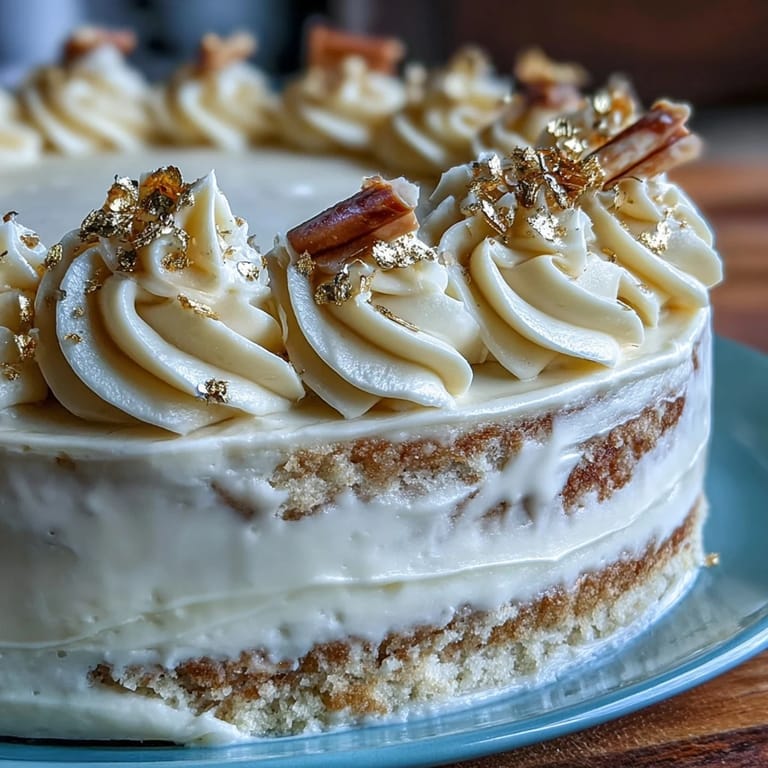
The Gold Foil Trick That Saves Time
Before my nephew's cake, I'd stress over making every inch of a decorated cake look perfect. Then I realized edible gold foil is basically permission to be minimal and still look luxurious. A few strategic sheets catch the light and make the whole cake feel intentional without requiring hours of piping work. You can buy it pre-cut into small sheets online, which costs a bit more but handles infinitely better than trying to cut full sheets yourself. Pro move: apply it about thirty minutes after your final frosting layer so the frosting is set but still slightly tacky enough for the foil to hold without sliding.
Timing and Make-Ahead Options
For a graduation party, you can bake the cake layers the day before and store them wrapped tightly at room temperature or in the fridge overnight. Make the frosting the morning of, frost everything three to four hours before serving so it has time to set, then decorate with gold foil and the topper in the final hour. This spreads out the work and means you're not stressed right before guests arrive. If you're really short on time, the unfrosted cake layers actually freeze beautifully for up to a month—just thaw them completely before frosting.
- Keep all ingredients at room temperature before mixing to avoid texture issues in the batter.
- Use tweezers when applying gold foil to protect the delicate sheets from fingerprints and tears.
- Bring the finished cake out of the fridge about thirty minutes before serving for the best flavor and moisture.
 Pin It
 This cake exists because someone believed in asking, and someone else believed in showing up. That's what graduations are really about, and a cake that tastes this good while looking this elegant just gets out of the way and lets people celebrate. Make it, serve it proudly, and watch people smile.
Recipe FAQs
- → How do I apply the edible gold foil?
Use clean, dry tweezers to gently place the delicate gold foil sheets onto the frosting without tearing.
- → Can I customize the buttercream color?
Yes, gel food coloring can be blended into the buttercream to match any preferred color scheme.
- → What is the best way to ensure even cake layers?
Level the cake tops with a knife after baking to create flat layers for smooth stacking and frosting.
- → How long should the cake be chilled during preparation?
Chill the crumb coat layer for 30 minutes before applying the final frosting to set the base.
- → Are there any tips for making the diploma topper?
The topper can be crafted from fondant using edible markers or purchased pre-made for convenience.