Pin It
 My sister called me three weeks before graduation asking if I could make her cake, and I'll admit my stomach dropped a little—not because I couldn't do it, but because I wanted it to be perfect for her big day. We'd never attempted a two-tier cake together before, and there was something about that request that felt like real trust. Standing in her kitchen the morning of the celebration, flour dust catching the sunlight through the window, I realized this wasn't just about baking; it was about marking a moment she'd worked toward for years.
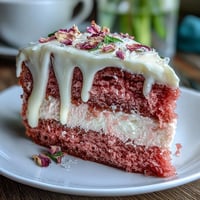
When my sister's friends saw that cake sitting on the dessert table, they actually gasped—and then they devoured it. But what made me happiest wasn't the compliments; it was watching her face light up when she realized I'd tinted the frosting in her school colors without her asking. Small touches like that, the ones you add because you know someone, they're what transform a cake from just dessert into a real memory.
Ingredients
- All-purpose flour (4 1/2 cups): This is your foundation—make sure it's fresh and not compacted in the bag, as old flour can affect rise and texture.
- Baking powder (3 1/2 tsp): Check the expiration date; stale baking powder won't give you that tender crumb you're after.
- Salt (1/2 tsp): Just a pinch, but it deepens the vanilla flavor in ways you won't consciously notice—you'll just know something tastes right.
- Granulated sugar (2 1/2 cups): The ratio of sugar to butter is what gives this cake its feathery texture; don't skip the creaming step.
- Unsalted butter (1 1/2 cups for cake, 2 cups for frosting): Room temperature is non-negotiable here—cold butter won't incorporate properly and your batter will be lumpy.
- Large eggs (8): Room temperature eggs blend seamlessly into the batter; cold ones can cause curdling and dense layers.
- Pure vanilla extract (2 tbsp for cake, 2 tbsp for frosting): The quality matters more than you'd think—imitation extract tastes thin and flat by comparison.
- Whole milk (2 cups): Bring it to room temperature before mixing so it doesn't shock the batter and deflate it.
- Powdered sugar (8 cups, sifted): Sift it before measuring, not after, and use your fingers to gently break up lumps—a food processor can overwork frosting.
- Gel food coloring (optional): Gel holds color better than liquid, and a tiny bit goes a long way—start with a toothpick dab and build up.
- Balloon cake toppers: These are your secret weapon; they do the decorating work and say everything about the celebration without you having to pipe a single rose.
Tired of Takeout? 🥡
Get 10 meals you can make faster than delivery arrives. Seriously.
One email. No spam. Unsubscribe anytime.
Instructions
- Set up and preheat:
- Get your oven to 350°F and grease those cake pans with butter, then line them with parchment paper—this step prevents sticking and heartbreak when you're turning out warm cakes. Write the pan size on each piece of parchment with a pencil so you don't accidentally pour 8-inch batter into a 6-inch pan halfway through.
- Make the dry mix:
- Whisk flour, baking powder, and salt together in a bowl; the whisking aerates the flour and distributes the leavening evenly. This takes maybe two minutes but it's the difference between a risen cake and a dense one.
- Cream butter and sugar:
- Beat room-temperature butter with sugar for 3 to 5 minutes until it's pale and fluffy—you're incorporating air that'll help the cake rise. When you lift the beaters, the mixture should fall in ribbons that dissolve slowly back into itself.
- Add eggs and vanilla:
- Crack eggs in one at a time, beating well after each one so they emulsify properly into the butter mixture. Add vanilla and beat for another 30 seconds until it's fully combined.
- Alternate dry and wet ingredients:
- Switch the mixer to low speed and add flour mixture and milk in three batches, starting with flour and ending with flour—this prevents overmixing and keeps gluten development minimal. Mix only until you can't see streaks of flour anymore.
- Fill and bake:
- Divide batter evenly between all four pans, tapping each one gently on the counter a few times to release air bubbles. The 8-inch cakes need 35 to 40 minutes while the 6-inch ones finish in 25 to 30 minutes; a toothpick inserted in the center should come out clean.
- Cool with patience:
- Let cakes rest in their pans for 10 minutes (this helps them firm up), then turn them out onto wire racks to cool completely. This is the hardest part because you want to frost them immediately, but warm cakes will melt your buttercream.
- Whip the frosting:
- Beat soft butter until creamy, then gradually add sifted powdered sugar a little at a time so you don't create a cloud of sugar in your kitchen. Once it comes together, mix in vanilla, salt, and milk a tablespoon at a time until it spreads like silk.
- Level and layer:
- If your cake tops are domed, use a serrated knife to slice them level, then place one 8-inch layer on a cake board and spread a thick layer of buttercream on top. Stack the second 8-inch layer and repeat with the 6-inch cakes, creating two separate stacked tiers.
- Apply crumb coat:
- Give each tier a thin first coat of frosting to trap any loose crumbs, then stick both cakes in the fridge for 20 minutes. This prevents crumbs from ending up in your final frosting layer.
- Finish frosting:
- Once chilled, frost each tier smoothly and generously with your remaining buttercream, using an offset spatula dipped in hot water for a polished finish. Work around the cake slowly and don't overthink it—rustic is just as beautiful as perfect.
- Stack the tiers:
- Center the 6-inch cake on top of the 8-inch cake, using wooden dowels or cake straws inserted into the bottom tier for support so the weight doesn't squish it. If you're nervous, insert three or four dowels around the center where the top cake will sit.
- Crown with balloons:
- Insert balloon toppers into the top tier and scatter edible confetti around if you're using it. Step back and let yourself feel proud—you've just made something that looks like it came from a professional bakery.
 Pin It
 Hours after the party ended, my sister texted me a photo of her and her friends with cake smeared on their faces, genuinely happy, and she wrote just one word: 'Perfect.' That's when I understood that baking for someone isn't about technique or presentation—it's about showing up for them in the way you know how.
Why the Two-Tier Design Works
The beauty of a two-tier cake is that it looks like you've spent all day in the kitchen when really you've just made two batches of straightforward vanilla sponge and stacked them. The size difference—8-inch base and 6-inch top—gives it natural elegance and proportion, and the height makes it a showstopper without requiring you to master intricate decorating skills. This design is especially perfect for graduations because the tiers themselves symbolize progression and achievement without being heavy-handed about it.
Frosting That Actually Stays Put
American buttercream is mostly butter and powdered sugar, which means it's forgiving if you get distracted mid-frost, but it also means you need to nail the ratio to texture. Too much milk and it becomes greasy; too little and it's stiff as spackle. The trick I discovered is adding milk one tablespoon at a time while beating, tasting as you go—you want something that spreads smoothly but holds its shape when you lift the spatula.
Temperature matters too; if your kitchen is warm, your frosting will soften quickly, so keep it in short bursts and return it to the fridge if it starts to feel slick. On the flip side, if it's too cold and firm, a 30-second microwave break (not longer, or you'll turn it to soup) will bring it back to workable.
Decoration Shortcuts That Don't Feel Like Shortcuts
Those balloon toppers are genius because they're playful, celebratory, and they fill the visual space without demanding that you pipe lettering or construct fondant flowers. They're also removable, so if someone (a curious toddler, perhaps) bumps the cake, you're not starting over. Add edible confetti around the base, scatter it on top, or leave it clean and simple—the balloons do enough talking on their own.
- Test any decorations in advance if you're using the graduate's school colors, so you know how they'll look against your frosting shade.
- Insert balloon toppers just before serving rather than hours ahead, as they can absorb moisture and wilt if the cake sits.
- Keep fresh flowers off the cake entirely unless they're certified food-safe; stick to edible elements so nothing questionable ends up in someone's mouth.
 Pin It
 A graduation cake is more than dessert—it's a moment someone will remember when they think back on their celebration. Make it with care, don't stress about perfection, and trust that the love you bake into it will come through in every bite.
Recipe FAQs
- → How do I achieve a moist vanilla sponge?
Use room temperature ingredients and alternate adding dry flour mixture with milk to keep batter smooth and moist. Avoid overmixing to retain air.
- → What is the best way to stack two cake tiers securely?
Level each cake layer, apply a crumb coat, chill to set, and use dowels or straws inserted into the bottom tier for support before stacking the smaller tier on top.
- → How can I tint the buttercream frosting evenly?
Add gel food coloring gradually to the buttercream and mix thoroughly to achieve uniform color without altering consistency.
- → What alternatives exist for decorating besides balloon toppers?
Consider edible confetti, sprinkles, fresh flowers, or themed figurines that complement the festive look without complicating assembly.
- → Can I prepare the cake layers ahead of time?
Yes, bake and cool the sponge layers in advance, then wrap tightly and refrigerate. Assemble and decorate closer to serving for freshness.