 Pin It
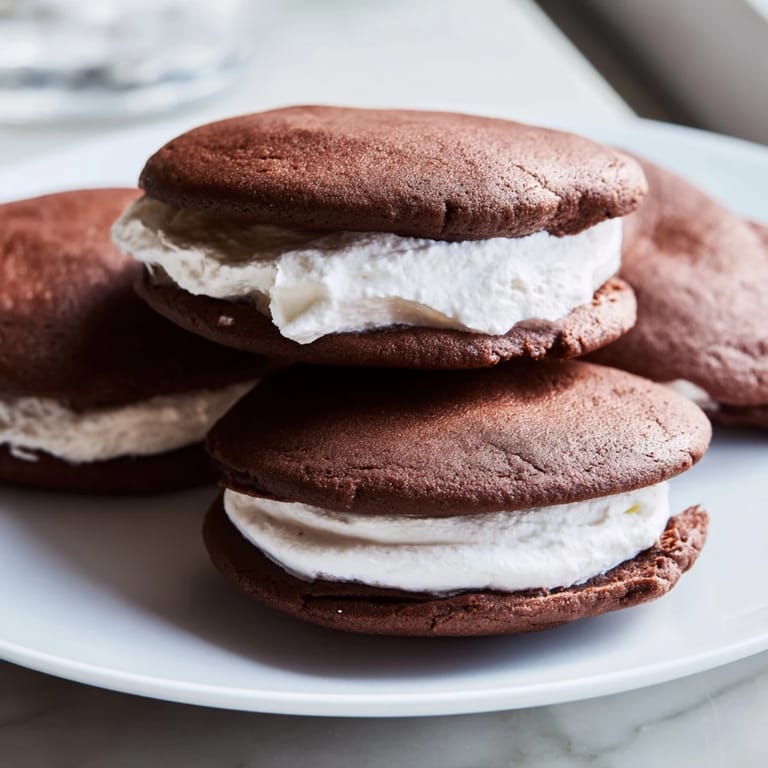
 My grandmother had a tin of whoopie pies waiting on the counter every time I'd visit her Lancaster kitchen, and I spent years thinking they were some kind of magic—how could something so soft and chocolatey possibly hold together? Years later, I finally asked her to teach me, and I realized the magic wasn't in any secret ingredient, but in that moment when you press two warm cake rounds together and the marshmallow filling squishes out at the edges just slightly. Now I make them the same way she did, and they never last more than a day.
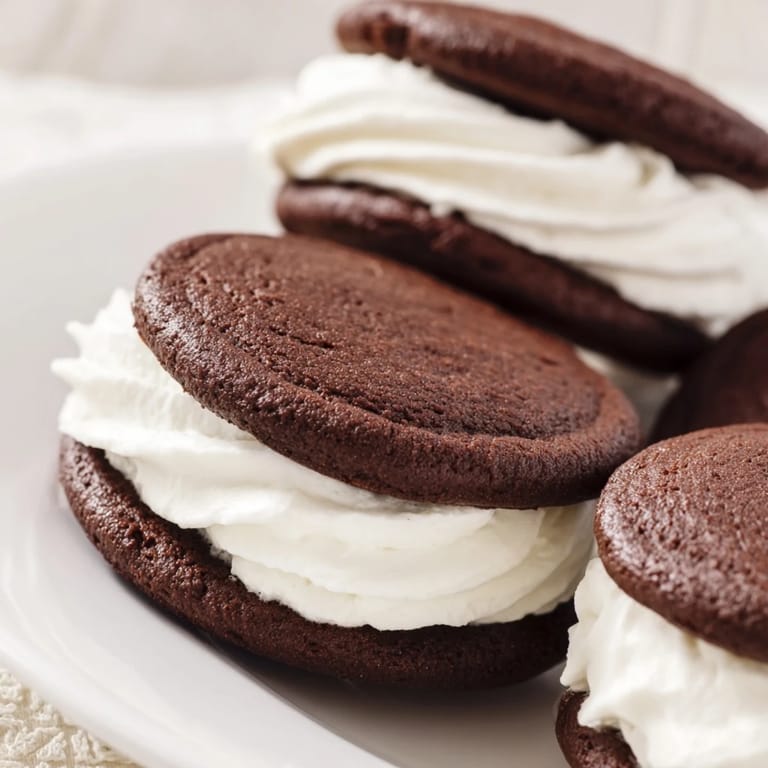
I made these for a church bake sale once and watched a woman pick one up, take a bite, close her eyes, and just smile—she didn't say anything, just smiled. That's when I understood that whoopie pies aren't really about the technique; they're about that unexpected softness you don't get in regular baked goods, paired with cream that tastes like someone gave you permission to eat dessert straight from the spoon.
Ingredients
- All-purpose flour: The foundation that keeps these tender rather than tough—don't sift it unless you want them to spread too much.
- Unsweetened cocoa powder: Use the good stuff here because it's the only chocolate you're getting in the cake; cheap cocoa tastes watery and thin.
- Baking soda and baking powder: This combination gives you that subtle lift without making them cakey, and the soda reacts with the buttermilk to create tender crumbs.
- Granulated sugar and butter: Cream these together until they look pale and almost fluffy—this is where the texture battle is won.
- Vegetable oil: This keeps them moist for days; butter alone would make them dry out.
- Eggs and buttermilk: The buttermilk makes them tender, and the eggs bind everything while adding richness.
- Marshmallow creme: This is the heart of the filling and honestly the reason people fall in love with whoopie pies—find the real stuff in jars, not the spray.
- Powdered sugar: Sift it or you'll have lumps in your filling that feel gritty.
Tired of Takeout? 🥡
Get 10 meals you can make faster than delivery arrives. Seriously.
One email. No spam. Unsubscribe anytime.
Instructions
- Set up and prep:
- Heat your oven to 350°F and line two baking sheets with parchment paper—this prevents sticking and lets you see when the bottoms are done. If you skip parchment, you'll spend ten minutes trying to peel them off with a spatula.
- Mix the dry ingredients:
- Whisk together flour, cocoa powder, baking soda, baking powder, and salt in a medium bowl, making sure there are no cocoa lumps hiding in there. This step prevents streaks of pure cocoa powder in your final cakes.
- Cream butter and sugar:
- Beat sugar, butter, and oil together until the mixture looks pale and fluffy, about 2–3 minutes; this is when you're aerating the batter and building structure. This is the texture moment that matters most.
- Incorporate eggs and vanilla:
- Add eggs one at a time, beating well after each one so they fully emulsify into the butter mixture. This prevents a greasy, separated cake.
- Alternate wet and dry ingredients:
- Starting and ending with flour, add the dry ingredients and buttermilk in three additions, mixing gently just until each addition disappears. Overmixing here develops gluten and makes them tough; you want a soft, almost velvety batter.
- Scoop and bake the cakes:
- Drop 2-tablespoon-sized mounds of batter onto the prepared sheets, spacing them 2 inches apart because they do spread slightly. Bake for 10–12 minutes until the tops spring back when you touch them gently—they should look barely set, almost underbaked.
- Cool the cakes:
- Let them rest on the baking sheet for 5 minutes so they firm up, then transfer to a cooling rack to cool completely. This step prevents them from breaking apart when you handle them.
- Make the filling:
- Beat softened butter until it's completely smooth and pale, then gradually add powdered sugar so you don't create a powdered cloud in your kitchen. Fold in the marshmallow creme gently—don't overbeat it or you'll deflate all the fluff.
- Assemble the pies:
- Spread or pipe filling onto the flat side of half the cakes, then press the remaining cakes on top, flat side down. If you pipe the filling, you get prettier-looking pies; if you spread it, you can taste the filling more in every bite.
- Chill before serving:
- Pop them in the fridge for 30 minutes so the filling sets and the whole thing holds together like it should. This is also when the flavors calm down and blend together.
 Pin It
 There's a moment when you bite into a whoopie pie and that outer chocolate cake just dissolves against your tongue before you even realize you're chewing, and then the marshmallow cream hits and you understand why this treat has survived for generations. It's not complicated, but it's the kind of simple that only works when every single step is treated with respect.
The Secret to Tender Chocolate Cakes
The reason these cakes don't taste like regular chocolate cake is because they're baked at a slightly lower temperature and for a shorter time than you'd expect. Most chocolate cakes want to be sturdy and crumbly; whoopie pies want to be soft and almost pliable, almost like eating a very thick, chocolatey pancake. If you've ever made a whoopie pie that felt too cakey, it's because you either overbaked it or your oven runs hot—check your oven temperature with a thermometer because ovens lie.
Making the Filling Your Own
The traditional marshmallow filling is where the magic happens, but I've learned that you can add a quarter teaspoon of salt to deepen the chocolate contrast, or swap in cream cheese for half the butter if you want them less sweet. Some people add a splash of almond extract or even a tiny bit of espresso powder to echo the chocolate in the cake. The filling should be thick enough to hold its shape but soft enough to spread easily—if it's too stiff, your cakes will slide around when you bite into them.
Storage and Keeping Them Fresh
These actually taste better the next day once the flavors have settled and the cake has softened even more from the moisture in the filling. Store them in an airtight container at room temperature and they'll stay fresh for up to three days—they're actually better than most cookies because they don't dry out. If you want to freeze them, wrap each one individually in plastic wrap and they'll keep for two months, though honestly they never last that long in my house.
- Keep them in a box with a layer of parchment between each layer so they don't stick together.
- If they start to feel hard, it means your container wasn't airtight; transfer them immediately to something sealed.
- On day three, if they start to feel a bit firm, microwave one for 8 seconds and it'll taste freshly baked again.
 Pin It
 These whoopie pies remind me that the best desserts aren't the ones with the longest ingredient lists or the trickiest techniques—they're the ones that taste like someone cared enough to get the fundamentals right. Make them once and you'll understand why my grandmother always had a tin waiting.
Recipe FAQs
- → What gives the cakes their soft texture?
The use of buttermilk combined with vegetable oil and butter creates a moist and tender crumb in the chocolate cakes.
- → How is the filling prepared?
The filling is made by beating butter until smooth, then gradually adding powdered sugar and marshmallow fluff, flavored with vanilla and a pinch of salt for balance.
- → Can I add extra chocolate flavor to the cakes?
Yes, a small amount of espresso powder can be added to the batter to deepen the chocolate taste.
- → How long should the assembled sandwiches chill before serving?
It's best to chill the cake sandwiches for about 30 minutes to allow the filling to set and enhance texture.
- → What is an alternative to butter in the filling?
For a classic variation, shortening can be used instead of butter to achieve a different texture in the filling.