 Pin It
 My daughter came home from school one afternoon with her lunchbox completely empty, which had never happened before. When I asked what changed, she said her friend's bento box looked like "art I could eat." That night, I raided the fruit bowl and started threading berries onto skewers, and suddenly lunch became something she actually looked forward to. Now every Sunday, we spend twenty minutes in the kitchen together arranging colors and flavors, and she's the one who decides what goes into her box.
I made these for my son's soccer team picnic, and watching eight-year-olds get excited about skewered pineapple instead of reaching straight for chips told me something had shifted. One kid asked if the dip was "fancy," which made me laugh—it's literally three ingredients whisked together. By the end of the day, three parents had asked me for the recipe, and I realized that sometimes the simplest presentations create the most memorable moments.
Ingredients
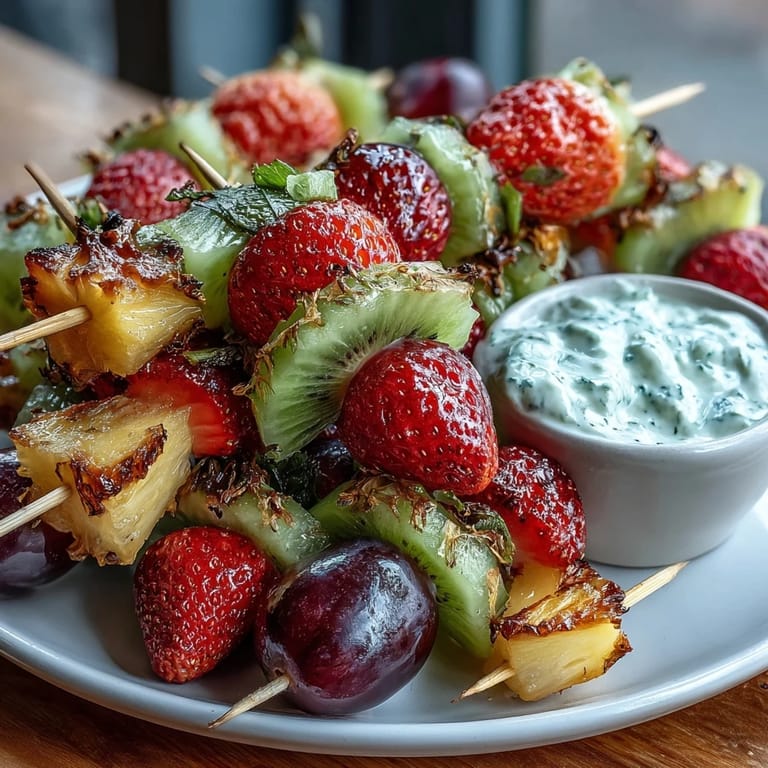
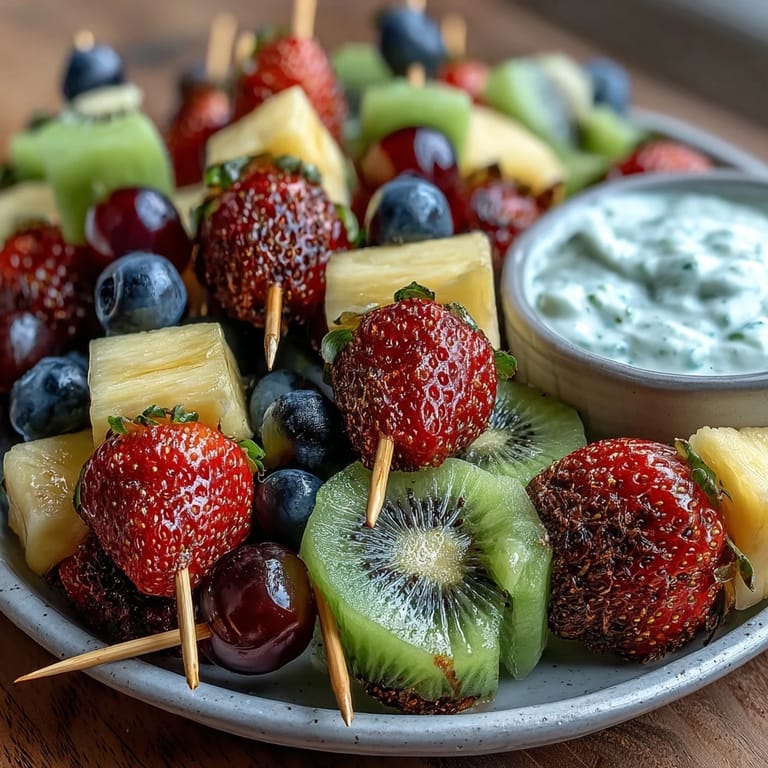
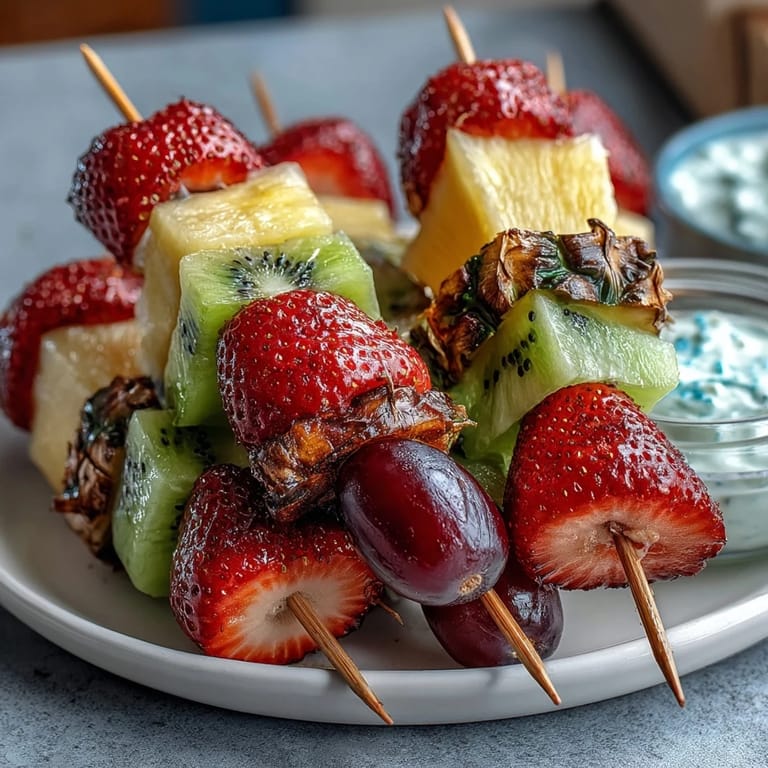
- Large strawberries: Hulling and halving them gives kids a perfect bite-size piece and makes the color pop on every skewer.
- Seedless grapes: These little spheres create natural spacing between other fruits and honestly make every other piece easier to thread.
- Pineapple chunks: Fresh pineapple holds its shape better than canned, plus the slight tartness balances the sweeter fruits beautifully.
- Kiwi: The bright green interior looks stunning and adds a slight tang that keeps the skewer from feeling one-note sweet.
- Banana: Slice thickly and use it right away or toss it in a tiny bit of lemon juice to prevent browning—it adds creaminess to each bite.
- Wooden or reusable mini skewers: Soak wooden ones in water for fifteen minutes before using so they don't splinter, and reusable ones are worth the investment if you make these often.
- Plain Greek yogurt: The tanginess here is the secret; avoid vanilla-flavored yogurt or it becomes cloyingly sweet.
- Honey or maple syrup: Just a tablespoon sweetens the dip without overwhelming the yogurt's natural flavor.
- Pure vanilla extract: This small detail bridges the gap between savory and sweet in a way that tastes naturally elegant.
- Whole wheat mini sandwich bread: Thin slices mean less bread, more filling—and they're easier for small hands to manage.
- Cream cheese: It spreads like butter and holds everything in place without being heavy.
- Deli turkey or ham: Optional but adds protein; choose lower-sodium versions if you're watching salt intake.
- Cucumber slices: Cool and hydrating, they prevent the sandwich from feeling dry and add a gentle crunch.
- Carrot sticks: Pre-cut them the night before so they're ready to go, and store them in cold water to keep them crisp.
- Cherry tomatoes: These little bursts of flavor feel indulgent compared to regular tomato slices, and they pack without getting soggy.
Tired of Takeout? 🥡
Get 10 meals you can make faster than delivery arrives. Seriously.
One email. No spam. Unsubscribe anytime.
Instructions
- Gather your fruit and inspect for ripeness:
- Pull everything out of the fridge and let it sit for five minutes so it's not ice-cold and flavorless. Give the strawberries and grapes a gentle rinse and pat dry—water beads left on the fruit will make everything slip off the skewer.
- Thread the skewers with intention:
- Start with a grape to anchor the bottom, then alternate between colors and textures as you go up. The rhythm of it becomes almost meditative, and kids catch on quickly if you let them try—aim for a pattern that looks balanced, not perfectly symmetrical.
- Whisk the yogurt dip until smooth:
- Combine the Greek yogurt, honey, and vanilla in a small bowl and stir for about thirty seconds. If the yogurt seems too thick, a splash of milk loosens it without diluting the flavor.
- Build the sandwiches with care:
- Spread cream cheese on one slice, layer turkey or ham if you're using it, then arrange cucumber slices in a single layer so they don't make the bread soggy. Top with the second slice and press down gently before cutting with cookie cutters or a knife into fun shapes.
- Arrange the bento box like you're creating something beautiful:
- Use the compartments intentionally, leaving a little space between items so everything looks fresh and inviting. Place the dip container in the middle or a corner where it's easy to access without tipping.
- Chill before packing for transport:
- Pop the whole box in the fridge for at least thirty minutes so everything stays cold and crisp. If it's going in a lunch bag, tuck an ice pack underneath or beside the box to keep it cool for hours.
 Pin It
 There's something quietly powerful about watching a child open their lunchbox and see something they helped create. My son started requesting these for every single school day, and eventually his friends did too—suddenly I was making four boxes a week instead of one. It wasn't about being fancy or perfect; it was about taking ten minutes to say, "This matters enough for me to arrange nicely."
Fruit Selection and Substitution
The beauty of this bento is that it works with whatever fruit is in season and within budget. I've used melon cubes in summer, thin apple slices in fall, and frozen blueberries in winter—each swap changes the vibe without changing the format. The only rule I follow is color contrast; if your skewer looks monochromatic, grab something from the other side of the produce section to break it up.
Making It Feel Special
Cookie cutters transform ordinary sandwiches into hearts, stars, or animals, which takes the "fancy" factor up significantly without adding any real work. I've also experimented with different bread colors—whole grain, sprouted, even thin flatbread—and each one shifts how the whole box feels. The truth is, kids eat with their eyes first, and a little visual thought tells them the meal is worth paying attention to.
Storage and Prep Strategies
I prep components the night before: wash and slice fruit, make the dip, and assemble sandwiches so nothing sits longer than necessary. The skewers go on wooden toothpicks if I'm prepping early, then get transferred to proper skewers right before packing. Keep everything separated until the last moment—this prevents sogginess and keeps colors bright.
- Cut fruit no more than a few hours before packing to preserve texture and prevent browning.
- Store the yogurt dip in a sealed container and never leave it unrefrigerated for more than two hours.
- If making these the night before, assemble the box in the morning so the dip stays fresh and nothing gets compressed.
 Pin It
 This is the kind of lunch that reminds kids (and adults) that food made with intention tastes different. Make it once, and you'll understand why it became a weekly ritual in our house.
Recipe FAQs
- → How do I keep fruit skewers fresh and colorful?
Use firm, ripe fruits and chill the skewers until serving. Adding citrus juice like lemon can help prevent browning, especially on bananas and kiwi.
- → Can I substitute the yogurt dip with a non-dairy option?
Yes, plant-based yogurts like coconut or almond can be used with the same honey and vanilla to maintain creaminess and sweetness.
- → What are fun ways to make the sandwiches more appealing?
Cut sandwiches into shapes using cookie cutters and use colorful fillings like cucumbers and cream cheese for visual interest and texture.
- → Are there nut-free ingredient options for this lunchbox?
Ensure all dairy and bread products come from nut-free facilities, and avoid adding nuts or nut-based spreads to maintain a nut-free meal.
- → How can kids be involved in preparing this lunch?
Invite children to thread their own fruit skewers and assemble sandwich shapes, which encourages creativity and makes the meal more enjoyable.